The Rhodes 22 Discussion Group
< prior
Back to Month
Go to Thread

Jesse Shumaker
Deck Joint repair question
2022-03-29; 12:37:46 EDT
Member Since
2019-06-04
Posts: 463
Graham,

Wow, what a project!  I think I'm content to admire what you did rather than taking on something that bold myself :)

Jesse
See the original archive post
On Mon, Mar 28, 2022 at 11:38 AM Graham Stewart <gstewart8 at cogeco.ca> wrote:

> Jesse:
> I did a full osmosis repair of the hull below the waterline. I dug out all
> of the blisters and filled them with epoxy filler than applied 6 coats of
> Interlux barrier epoxy coating and then antifouling of course. In the
> process I raised the waterline about 2" as I had some osmosis in that area.
> Figuring exactly where the new waterline would go turned out to be a puzzle
> as you can't just measure up 2" from the old one. Also I discovered that
> the lines on the port and starboard were not in exactly the same position -
> not that anyone could tell but that set me off on a quest to solve the
> "problem".
>
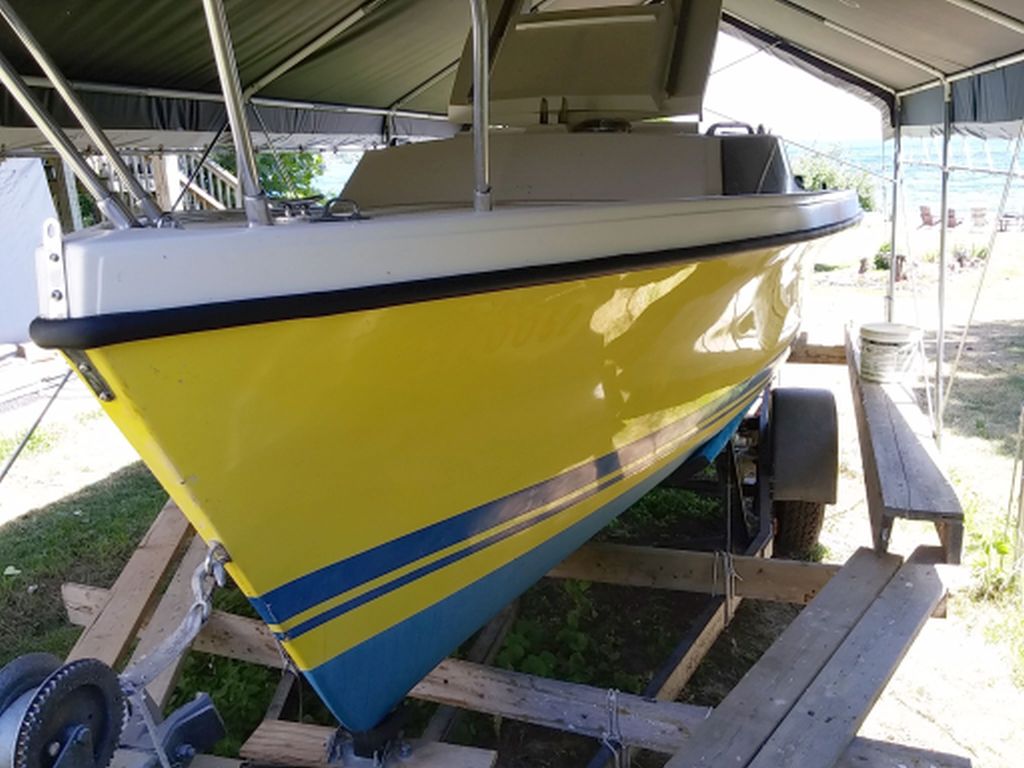
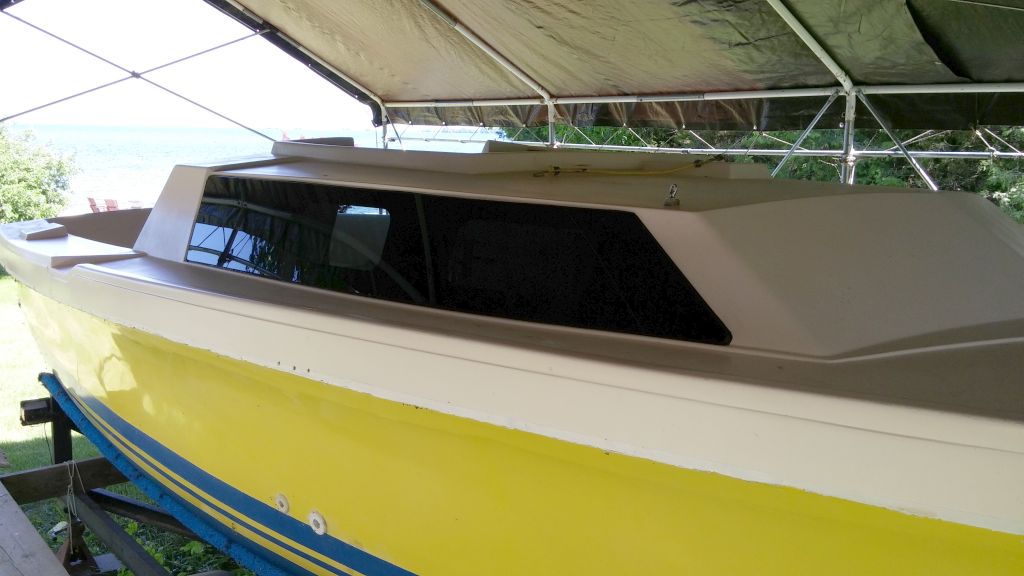
> The topsides were painted with an Awlgrip-type paint many years ago and
> before I bought the boat in 1995. The boat is an incredible endorsement for
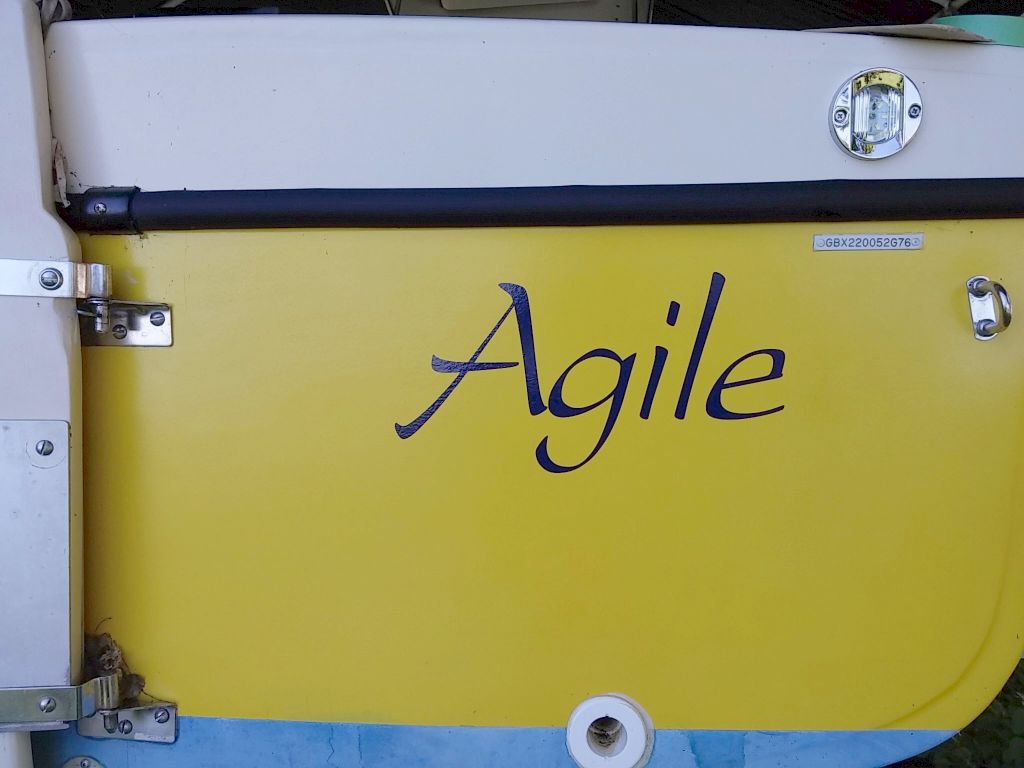
> the longevity of the paint. The exception was the transom which had been
> damaged when the rudder popped off while the boat was at anchor and badly
> scraped the gel coat. I also decided that the rudder was not centered
> precisely and decided to "correct" its location. Another sink hole for time
> it turned out. As a result of all this I had to paint the transom. It is
> not the exact same color but you can't tell because the light always hits
> it from a different angle than the sides. Yellow is a difficult color to
> get proper coverage with so I must have painted it 10 times before I was
> adequately satisfied.
>
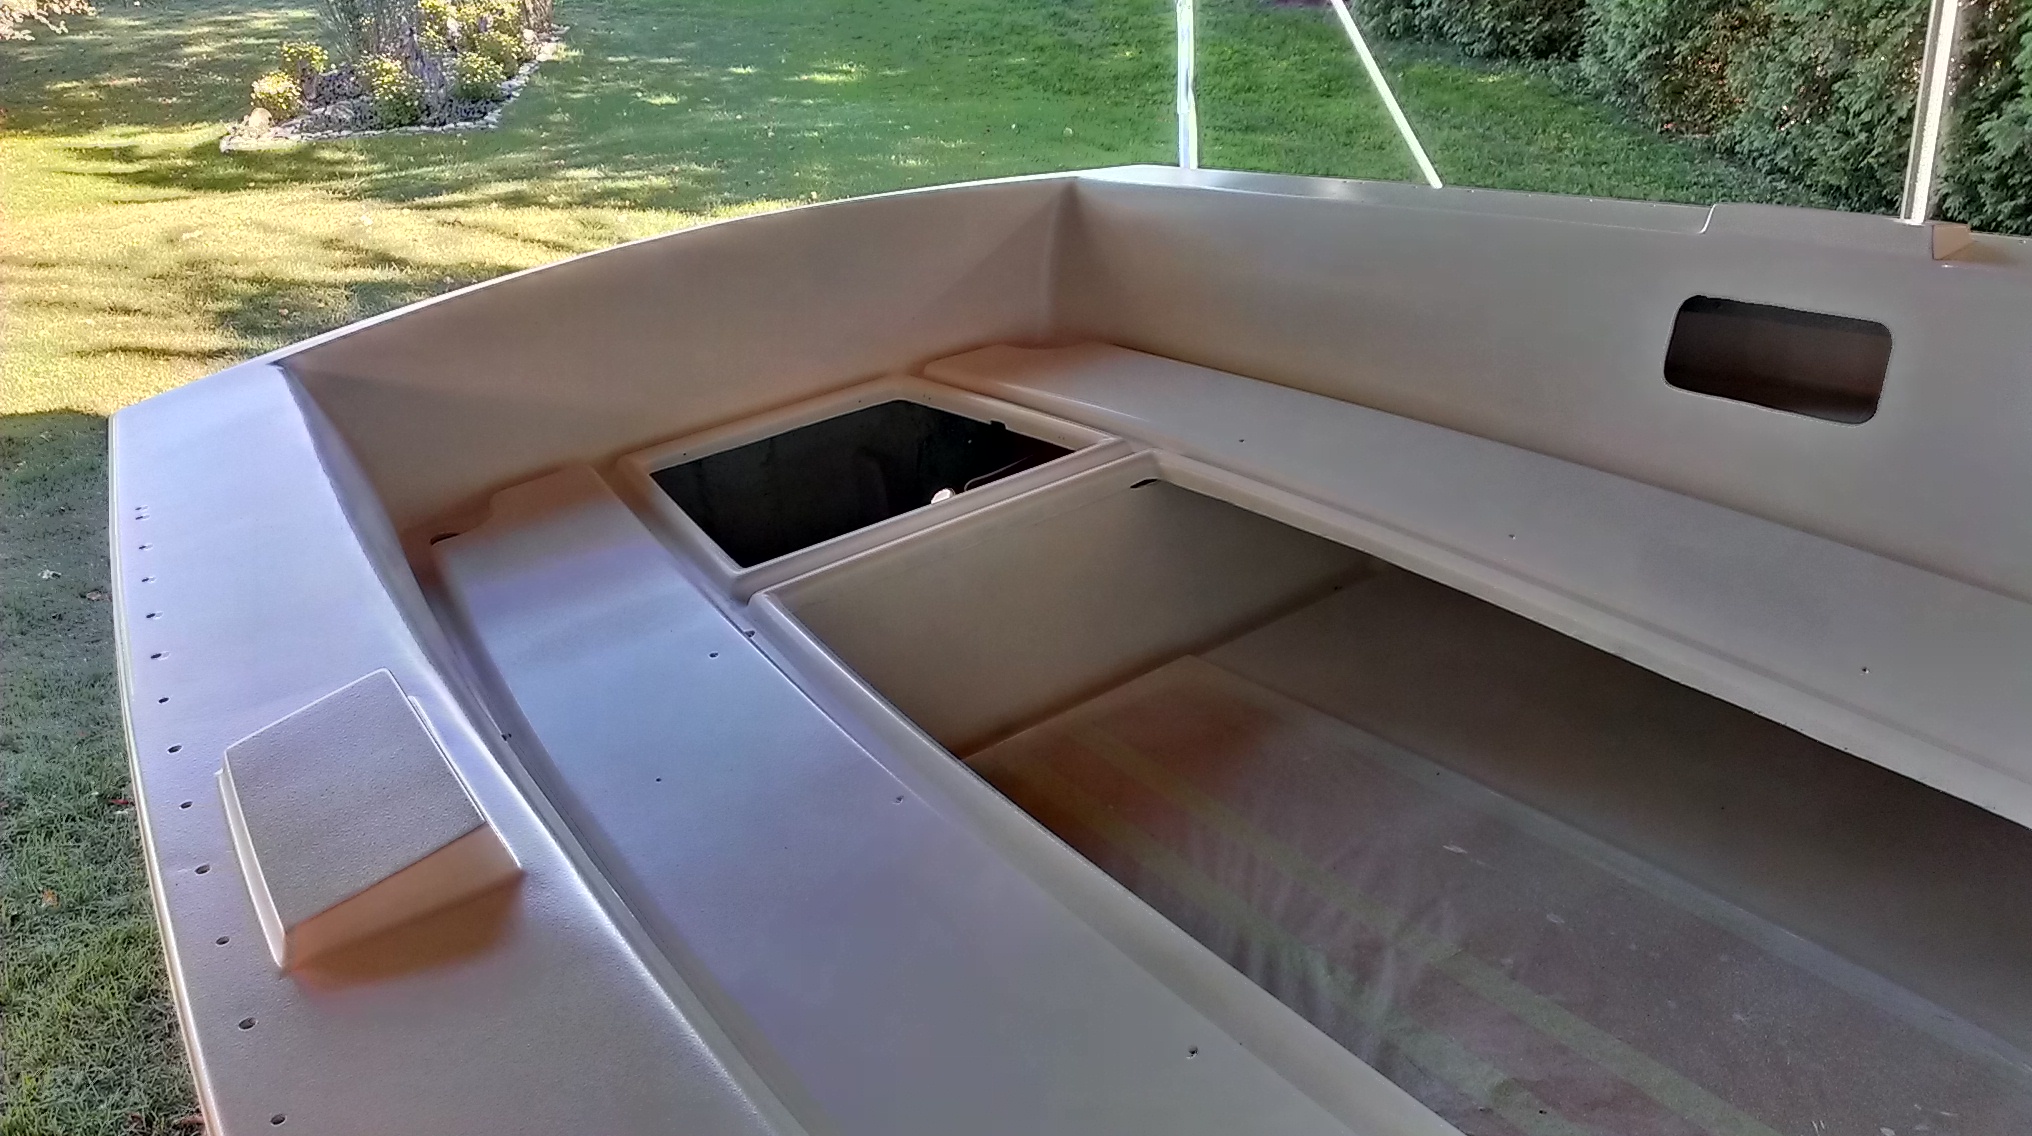
> Because of the extensive deck work I had done I had no choice but to paint
> the deck and cockpit - everything white. I also glassed over all of the
> original non-skid so I needed to replace that as well. I used Kiwi Grip - a
> truly wonderful product.
>
> I had never spray painted anything before and starting with a deck and
> cockpit is not how one wants to build experience. Also I didn't want to
> splurge on an expensive spray painting setup so I bought a very cheap HVLP
> system on sale for $35 Canadian dollars. I used System 3 waterborne LPU
> paint and epoxy base coat. I applied three coats of the base and about 3+
> coats of the top coat. I would give the paint a questionable review as to
> longevity - especially compared to the hull paint but I had no desire to
> spray a dangerous and difficult to manage epoxy paint. I have attached a
> picture of the boat when newly painted and with the new windows installed
> and I was pretty pleased with it given that it should have been a disaster.
> Since then the paint has cracked in some corners and lifted up in a few
> places. I have found, however, that repairing these problems is not very
> difficult. I just use an airbrush for small problems and that works pretty
> well without having to get out the HVLP sprayer, do a lot of masking and
> use a large quantity of expensive paint.
>
> It is an old boat (76) and on the whole I am happy with it. A lot of work
> though with removing all hardware and reinstalling it afterwards. The boat
> deck fairing took me forever until I learned to not use a random orbital
> sander. The sander makes it smooth but not flat. You really have to use a
> long-board sander. While very tiring, it is much faster in the end.
>
> Take copious notes and photos about where all the hardware was located -
> you WILL NOT be able to figure it out easily afterwards when the deck is
> repaired and painted. I did pretty well with most of the hardware but
> failed to make notes about the exact placement of the chain plates. That
> was a mistake as being off only a little can become a significant problem.
> I was changing the hardware and attachment for the chain plates so they
> necessarily needed to be moved slightly anyway but knowing the exact
> location of the old ones would have made my life much easier.
>
>
> Graham Stewart
> gstewart8 at cogeco.ca
>
>
>
>
>
>
>
> -----Original Message-----
> From: Rhodes22-list [mailto:rhodes22-list-bounces at rhodes22.org] On Behalf
> Of Jesse Shumaker
> Sent: Monday, March 28, 2022 8:01 AM
> To: The Rhodes 22 Email List
> Subject: Re: [Rhodes22-list] Deck Joint repair question
>
> Thanks for the photos Graham.  One of your photos sparked another question,
> did you tackle the paint job for the top sides yourself?  It looks like it
> came out very well.  If I recall correctly from a previous post, you
> addressed some issues on the bottom, then applied an epoxy barrier coat
> before putting on bottom paint.  I think that post was when you explained
> your "boat gallows" setup to hoist the boat.  I wasn't sure if you painted
> the top sides yourself as well.
>
> Jesse
>
> On Sun, Mar 27, 2022 at 8:36 PM Graham Stewart <gstewart8 at cogeco.ca>
> wrote:
>
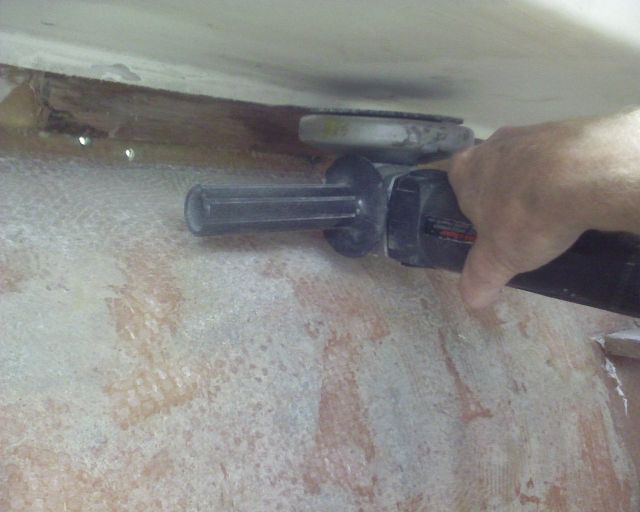
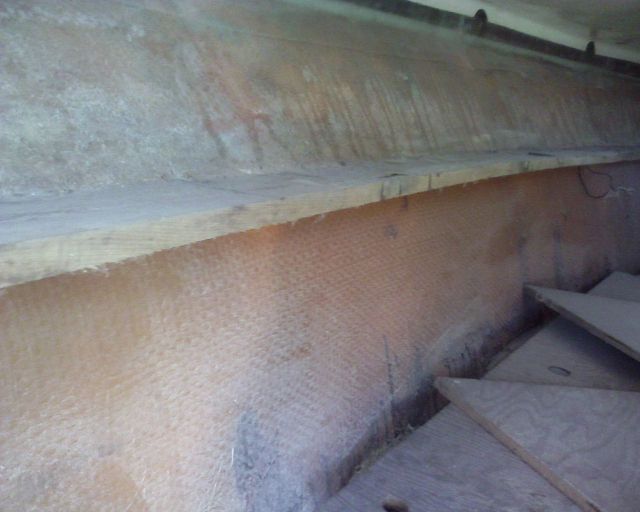
> > Can't say I have many pictures of the fix for the hull-deck joint repair
> > but have attached what I have. As I mentioned before I cut back the
> flange
> > on the upper liner so I could get access to the inside joint which I then
> > filled with thickend epoxy and covered with several layers of fiberglass
> > cloth. That made the whole boat more rigid and certainly stopped any
> leaks
> > but, like most of what I did, was grand overkill.
> >
> > I used simple tools to remove the old sealant after removing the old rub
> > rail. I don't think it is possible to remove the rub rail without
> > destroying it. The new rub rail was made by Tessilmayer. The new rail cap
> > goes over a track that was screwed and riveted through the joint. Why
> did I
> > use both screws and rivets? God knows.
> >
> > Graham Stewart
> > Agile, Rodes 22, 1976
> > Kingston Ontario
> >
> >
> >
> >
> >
> >
> >
> > -----Original Message-----
> > From: Rhodes22-list [mailto:rhodes22-list-bounces at rhodes22.org] On
> Behalf
> > Of Jesse Shumaker
> > Sent: Sunday, March 27, 2022 8:35 PM
> > To: The Rhodes 22 Email List
> > Subject: Re: [Rhodes22-list] Deck Joint repair question
> >
> > I've been following this thread with interest since I had wondered about
> > the hull to deck joint and what would be involved in resealing it if I
> ever
> > had to do that.  Since a few people have been down this road, I wonder if
> > Chuy, Graham, or others have any photos of this project in progress.
> > Rodney, it will be good to hear how your project turns out.
> >
> > Jesse Shumaker
> > S/V Zephyr
> >
> > On Sun, Mar 27, 2022 at 12:05 PM chuy carreon <chcarreon at cox.net> wrote:
> >
> > > Great idea on the 3m 4200. I removed the aluminum guard rail with care
> > and
> > > drilled out the rivets. Most were decomposed. I used aluminum bolts and
> > > locking nuts with a washer. Used plenty of 4200. I think now I should
> > have
> > > used stainless steel with a new guard rail. But even now do not know
> what
> > > that would have been.  All is holding well.
> > >
> > > Good luck.
> > > Chuy
> > > 1987 AfterMath
> > >
> > > > On March 25, 2022 at 11:34 AM RODNEY BROWN <rnelson204 at gmail.com>
> > wrote:
> > > >
> > > >
> > > > Thanks to everyone who replied. Ive ordered some 3m 4200 and will
> > > attempt the easier route up the mountain before I start taking a bunch
> of
> > > stuff apart.  I’ll report back in when its complete and Ive had time to
> > > test her out.
> > > >
> > > > Have a great weekend all,
> > > >
> > > > Rodney
> > > >
> > > > > On Mar 25, 2022, at 10:24 AM, Lowe, Rob <rlowe at vt.edu> wrote:
> > > > >
> > > > > Rodney,
> > > > > I had a similar problem with my first Rhodes.  I just got a chalk
> gun
> > > and chalked around the joint as best I could.  Problem solved.  Don't
> > use a
> > > silicon chalk as you'll never get of off if you need to.
> > > > >
> > > > > Rob
> > > > >
> > > > > -----Original Message-----
> > > > > From: Rhodes22-list <rhodes22-list-bounces at rhodes22.org> On Behalf
> > Of
> > > R Brown
> > > > > Sent: Thursday, March 24, 2022 2:30 PM
> > > > > To: The Rhodes 22 Email List <rhodes22-list at rhodes22.org>
> > > > > Subject: [Rhodes22-list] Deck Joint repair question
> > > > >
> > > > > Hope everyone is having a great week.  I purchased my Rhodes in
> Jan,
> > > and the owner mentioned that he was planning on resealing the deck
> joint
> > > this year (she leaks a little water on the starboard side galley are
> when
> > > the gunwales are buried). The search function lead to me to a few
> threads
> > > on this topics, but left me with questions.  (My boat was built in
> 2001)
> > > > >
> > > > >
> > > > > A. What to parts should I expect to replace?   I’ve read mention of
> > > drilling out rivets when resealing the joint.
> > > > >
> > > > > Some one mentioned replacing rivets with bolts. Are there thoughts
> > > about the pros and cons of bolt vs. rivets?
> > > > > Does anyone have a suggestion on what size rivets I’ll need? Also,
> > > where is a good source to purchase them?
> > > > > Should I plan on replacing the rub rail while doing this?
> > > > >
> > > > > B. How much time should I budget for this repair?
> > > > >
> > > > > C. Lastly, would anyone be willing to talk live to share the
> > > experience on this repair.  If so my cell is 405-496-5533
> > > > >
> > > > >
> > > > > Thanks in advance for helping this rookie out.
> > > > >
> > > > >
> > > > > Cheers,
> > > > >
> > > > > Rodney
> > > > >
> > > > >
> > > > >
> > > > >
> > > > >
> > > >
> > >
> > -------------- next part --------------
> > A non-text attachment was scrubbed...
> > Name: tools for removing sealant in hull deck joint June 2016 (3).jpg
> > Type: image/jpeg
> > Size: 1935155 bytes
> > Desc: not available
> > URL: <
> >
> http://rhodes22.org/pipermail/rhodes22-list/attachments/20220327/12745714/attachment.jpg
> > >
> > -------------- next part --------------
> > A non-text attachment was scrubbed...
> > Name: Hull - Deck join rebuild 2009 (3).jpg
> > Type: image/jpeg
> > Size: 40146 bytes
> > Desc: not available
> > URL: <
> >
> http://rhodes22.org/pipermail/rhodes22-list/attachments/20220327/12745714/attachment-0001.jpg
> > >
> > -------------- next part --------------
> > A non-text attachment was scrubbed...
> > Name: Hull - Deck join rebuild 2009.jpg
> > Type: image/jpeg
> > Size: 38901 bytes
> > Desc: not available
> > URL: <
> >
> http://rhodes22.org/pipermail/rhodes22-list/attachments/20220327/12745714/attachment-0002.jpg
> > >
> > -------------- next part --------------
> > A non-text attachment was scrubbed...
> > Name: Reb rail installed- Tessilmare July 2016.jpg
> > Type: image/jpeg
> > Size: 125435 bytes
> > Desc: not available
> > URL: <
> >
> http://rhodes22.org/pipermail/rhodes22-list/attachments/20220327/12745714/attachment-0003.jpg
> > >
> >
> -------------- next part --------------
> A non-text attachment was scrubbed...
> Name: Agile name and lettering October 2016 (3).jpg
> Type: image/jpeg
> Size: 71754 bytes
> Desc: not available
> URL: <
> http://rhodes22.org/pipermail/rhodes22-list/attachments/20220328/8c367b46/attachment.jpg
> >
> -------------- next part --------------
> A non-text attachment was scrubbed...
> Name: Agile cockpit painted September 2013.jpg
> Type: image/jpeg
> Size: 720145 bytes
> Desc: not available
> URL: <
> http://rhodes22.org/pipermail/rhodes22-list/attachments/20220328/8c367b46/attachment-0001.jpg
> >
> -------------- next part --------------
> A non-text attachment was scrubbed...
> Name: HVLP spray gun and turbine.jpg
> Type: image/jpeg
> Size: 81717 bytes
> Desc: not available
> URL: <
> http://rhodes22.org/pipermail/rhodes22-list/attachments/20220328/8c367b46/attachment-0002.jpg
> >
> -------------- next part --------------
> A non-text attachment was scrubbed...
> Name: Agile Rhodes 22 launched at dock 2020 b.jpg
> Type: image/jpeg
> Size: 2678432 bytes
> Desc: not available
> URL: <
> http://rhodes22.org/pipermail/rhodes22-list/attachments/20220328/8c367b46/attachment-0003.jpg
> >
> -------------- next part --------------
> A non-text attachment was scrubbed...
> Name: Starboard window installed June 6. 2015.jpg
> Type: image/jpeg
> Size: 96409 bytes
> Desc: not available
> URL: <
> http://rhodes22.org/pipermail/rhodes22-list/attachments/20220328/8c367b46/attachment-0004.jpg
> >
>



Message to Webmaster:
To use your email application to send a messsage to the webmaster rather than this form, .
Post to the Rhodes 22 Email List:
Sending Post:
Your post is being sent...